As spring’s gentle introduction to the charm of the floral theme is officially through, nature decided that it was time to turn to the next season’s ravishing blooms. Dahlias, lilacs, hydrangeas – there’s nothing like this aestival frenzy of colors, aromas and textures! With such beauties blooming around, it’d be a shame not to get these multi petal children of summer take over the scene not only in the outside but in the insides of our homes too.
That’s why Royal Present Embroidery encourages everyone to surround themselves with summer’s most sumptuous gems. With new floral designs available at our updated catalogues everyone can welcome summer flowers into your homes. Start exploring our summertime catalogues with Hydrangea Corner Machine Embroidery Design. Vibrant, fresh and utterly gorgeous, this hydrangea pattern will breathe into your home sweet air of most exquisite summery blooms.
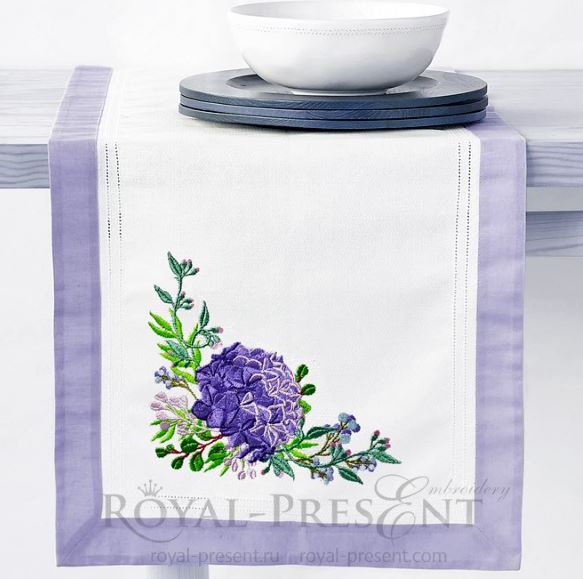
Hydrangea corner Machine Embroidery Design

Formats: .dst, .pec, .vip, .hus, .pes, .exp, dat, jef, .vp3, xxx, tab
Hydrangea Corner Machine Embroidery Design boasts of most refreshing and dreamy color-palette, gleaming with blushing violet colors. Dressed in Madeira Classic 1030 Lake Blue, 1033 Mulberry, 1034 Burgundy, 1120 Crystal Pink and 1232 Violet, this amethyst rainbow makes a glorious tribute to Panetone color of the year 2018. Such an “ultra-modern†guise is aptly enhanced by a cutting-edge delineation of the flower-head itself. With all the “graphic†and exquisitely geometrical representation, hydrangea corner design gives an edgy twist to the classic floral motif. Such a dazzling harmony of modern and time-honored themes makes Hydrangea corner pattern a true gem of any embroidery collection.
Read on for inspirational ideas of how to use this Hydrangea design for Machine Embroidery in various decorative projects.
With Panetone giving this year’s free reign on the all things purple, this floral design is bound to be hit with everyone. Work it on set of place-mats for your Nana to make her heart melt with true pride and joy. For your mom, hydrangea corner machine embroidery design can be introduced on the form of a smart set of table linens. She’ll love boasting her friends about how thoughtful and tasteful her daughter’s gift is. Your sister, who’s not into stocking up on the household textiles yet, can use a denim jacket, embroidered with two hydrangea corners. Work the pattern as two mirrored designs to create a beautiful floral symmetrical ornament.
We bet the examples have made you rummage through your supplies, checking if you’ve got enough threads and stabilizers! Yep, this hydrangea design for machine embroidery is as inspirational as it’s gorgeously beautiful. Good thing about it too, is that its quality will make working with it such a breeze that even a novice in machine embroidery can create any of the items we’ve described. What’s more, besides the ideas for implementation of this design, we’ve also taken care of the technical parts of the work! Further you can read some pretty helpful tips on how to place, hoop and stitch corner machine embroidery designs. We’ll be describing the entire process, taking as an example Hydrangea corner machine embroidery design and a cotton napkin. The info will help you avoid mistakes in the work, and hopefully turn the creative process into a pure artistic joy.
Few things that you’ll need to know before starting working with corner machine embroidery designs.
1 – Placement. Think through where you’re going to place a corner design. If you place it too close to the edges, there’s chance that your hoop will not be able to “catch†the embroidered-to-be item properly. Of course there’re ways to embroider without the hoop (floating technique), but still placement is the first thing to consider.
2 – Hooping. If you’re set on placing your corner design close to the edges, chances are that you won’t be able hoop your fabric properly. Don’t worry, you still will be able to embroider, but for that you’ll need to make some preparations for the item to fit into the hoop. Here’re some of the methods, used by embroiderers all over to overcome such a conundrum.
~ Floating technique. The embroidered-to-be item is attached to the hooped stabilizer. The design is stitched on the floating fabric (thus is the name of the technique).
~ Fabric extension. The embroidered-to-be item is “augmented†with pieces of random fabrics or stabilizers so that it becomes large enough to fit into the hoop properly. The augmented pieces either stitched or glued to the main fabric. After the embroidery is over, they are removed. Another variation of fabric extension is attaching (gluing) the textile piece to a bigger piece of stabilizer. The sandwich then hooped as usual with the stabilizer being the main carrier of the pressure from the hoop. If your machine has basting function you can use it for additional stabilization. The gluing agent in this case can be either temporary spray adhesive or the adhesive layer of the stabilizer itself.
Now let’s speak about details of our hydrangea corner machine embroidery design napkin project.
First of all let’s sort out our supplies. Machine Embroidery on table linens requires a pretty simple set of supplies. Most linen fabrics are stitched with 75/11 size of sharp embroidery needles. Usually any type of threads can be used. We used rayon threads (# 40). Stabilizers will largely depend on the quality of your napkin fabric. The looser the weave, the sturdier should be stabilization. Ideally, stabilization-wise, cut-away backing is what will help you get the most perfect results. However, not everyone is fond of the backside of the embroidery, when cut-away backing is used. To find a happy middle, we suggest using either medium-weight tear-away backing, or, even better, a water-soluble type of stabilizer. Additional stabilization (for the abovementioned problems with hooping) in the form of temporary spray adhesive or an adhesive layer of the stabilizer itself will also be needed. So, now that the supplies are all set, let’s move on to the instruction.
Yow to embroider a cotton napkin with Hydrangea design for Machine Embroidery.
1 – Print out a template of Hydrangea Corner Machine Embroidery Design and roughly cut out the outline of image. The template has pre-marked axis lines for easier design centering.
2 – Trace the pre-marked axis lines from the cut-out onto the corner of your napkin. Use temporary textile marker for the job.
3 – Hoop the stabilizer
4 – If you’re using self-adhesive stabilizer, remove the coverage; otherwise skip the step 4 and move on straight to step 5.
5 – Draw on the stabilizer two crossed axis lines (their coordinating marks are given on the band of the hoop). These lines will help you center the napkin in the hoop squarely.
6 – If you’re using a non-adhesive stabilizer, apply temporary spray adhesive onto the hooped baking.
7 – Smooth the embroidered-to-be area of the napkin onto the hooped stabilizer coordinating their axis lines.
8 – Embroider.
9 – After the embroidery is done, remove the excess backing, gently pulling it away from the stitching. You might want to hold the stitching with your fingers to prevent the fabric (and the stitches) from stretching too much. Remove loose thread ends too.
10 – If the marks from your temporary textile marker are still visible, give the napkin a gentle wash. Never iron the fabric with the marks from the marker being still on. Heat from the iron will make the marks permanent.
Now your napkin with Hydrangea Corner machine embroidery design is ready to be used. You can make several of such beautiful napkins to decorate your next summer party meal or give as a gift for someone really special. As the design is available in 3 sizes, napkin set can be expanded into a gorgeous array of smart napery or even assortment of other decorative textiles. Accent pillows, table-top covers – you name it! With wonderful pattern like this hydrangea design for machine embroidery you fantasy is your limit!
You may also like
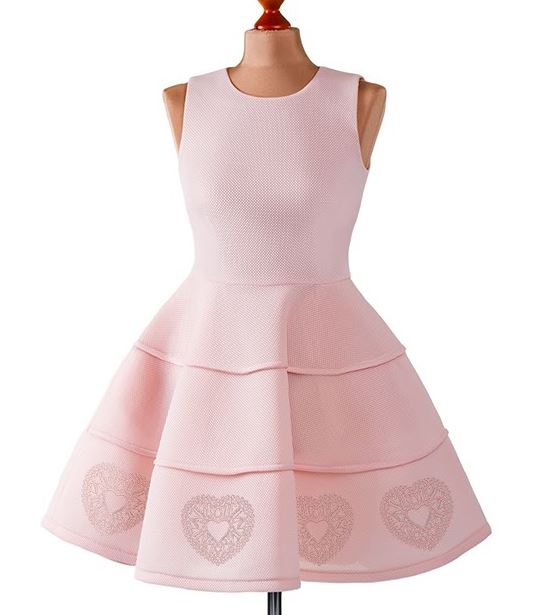
Machine Embroidery Design Lace Heart

Author: Ludmila Konovalova
My name is Lyudmila Konovalova, and I lead Royal Present Embroidery. Embroidery for me is more than a profession; it is a legacy of my Ukrainian and Bulgarian heritage, where every woman in my family was a virtuoso in cross-stitch and smooth stitching. This art, passed down through generations, is part of my soul and a symbol of national pride.
Date: 16.06.2018

 Get Sign-In Link
 Login with Google
 Login with Facebook
 Login with Amazon
 Login with Paypal