Free Machine Embroidery Designs and Machine Embroidery Patterns Online
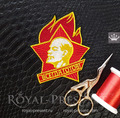
Soviet Scouts symbol Machine Embroidery Design


By knowing the speed of your embroidery machine, you can find out how long it will take to embroider a design.
To use the embroidery calculator, click on the number of stitches in the product description.
Size: 83.0x98.0 mm (3.27x3.86 "), Stitches: 20774
Formats: .dst, .jef, .pec, .vip, .hus, .pes, .exp, .sew, .dat, .vp3, xxx
Create a patch using Soviet Scouts symbol Machine Embroidery Design
So, to get such a stylish patch for clothes, follow these steps:
1. Take a base fabric for the patches, or usual felt fabric, preferably black.
2. Hoop the fabric.
3. Take the tear-away stabilizer. The ideal is self-adhesive Madeira Cotton Fix Tear-away stabilizer. Glue it to the fabric. To do this, simply tear off the protective film and apply a sticky side to the wrong side of the base. For black fabric is best to take a black stabilizer.
4. Embroider the design.
5. Tear off excess stabilizer and cut the fabric close to the contour.
Your patch is ready! It remains only to attach it to the product. You can sew a patch with a sewing machine, stitching a line around the contour, or by hand.
Nevertheless, we recommend using a special adhesive base for the stripes. It consists of two layers. One layer is matte and the other is glossy.
1. Cut the canvas a little bigger than your patch.
2. Attach it with the glossy side down, matte up to the wrong side of the patch.
3. Iron the film. After about a minute, it will stick to the patch.
4. To glue the patch to the fabric, simply tear off the protective coating and apply a sticky side to the fabric in the required place. Then iron the patch with again.
This design has been tested and reviewed to ensure top quality. Test stitch the design, or portions of it, before stitching it onto your final item, as results may vary depending on fabric and stabilizer combination.
Please don't sell or trade the embroidery file.

 Get Sign-In Link
 Login with Google
 Login with Facebook
 Login with Amazon
 Login with Paypal